December 22, 2009

A light in da pipe


Hah! I love it when a plan comes together...

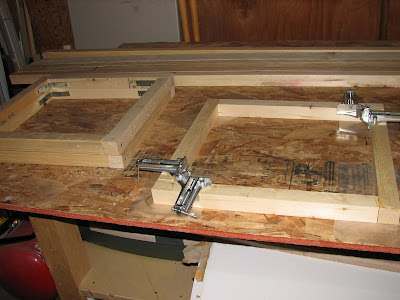
I did get held up a bit trying to figure out how to cut the tubes to fit. You see one end is at a 45 degree angle because of the false wall and the all other cuts would need to be straight up and down. What I came up with was a cutting "jig" that I could set to any angle I wanted and would hold the tube still while I sawed it in half. It worked like a champ. Sometimes if you don't already have the right tool, you can make it.

The "pipe" is up there and its working now. I still have a few touch ups here and there. The main one will be covering all those screw holes with some same painted rivets. You can also still see the white from the track lighting unit itself so a little camouflage in the form of some carefully applied paint will be in order once the current blizzard passes. Stupid winter.

The cord and switch will be handled next. The switch will be a dimmer with one of the wheels I cast way back mounted on it. The cord will be in a run painted a brass color. This should be a cool way of turning on those overheads.

But right now I'd like to bring it down a little. Mellow out our groove some. And sincerely wish you all a joyous Christmas and a great New Year! Make it count!

And thanks for the support you have all given me over the years. Peace.

December 7, 2009

Nook of Armaments, Chapter 2, verses 9-21


Sorry no Holy Hand Grenades in there...

Christmas season and the weather have slowed down my progress. The track lighting itself is up but the "ventilation" tubing is not since it requires painting. Which requires outside. Which requires good weather. Etc etc.

We turn then to a quick little project to hide my utilitarian looking gun cabinet which certainly does not look the Nautilus part. It is simply a half box made from masonite, a couple long hinges, and some more of the ubiquitous rivets to form a door to hide and give access to the locker. Its been painted the same three part scheme as the surrounding wall and topped with some spare molding. Simple. Boring.

What you WILL see on the face of this thing though down the road is a number of aged looking brass gauges with depth and speed indicator needles and everything. One of the gauges will actually be functional. It is a real working inclinometer that ,when on a ship, shows the degree of roll the vessel has as it moves through the sea. Clearly the house won't be rolling or pitching but still, a neat nautical touch I thought.

Next post-I swear- will be the whole overhead track lighting tableau installed. Its going to be tricky to do but will look O' so cool.

November 15, 2009

Station the track (light)ing party


Sub talk..Ha ha

Anyhow, we are back at work in the room. We? Me, myself and and Buddy-Lee. We have spent the last couple of weeks un-halloweening the house and getting parts prepared for the overhead track lighting.

We can't just have a klunky looking track screwed to the ceiling but I need more light for the worktable and the painting booth. So what I am doing is trying to disguise the whole thing as rusty ventilation or seawater piping to blend in and look more subby.

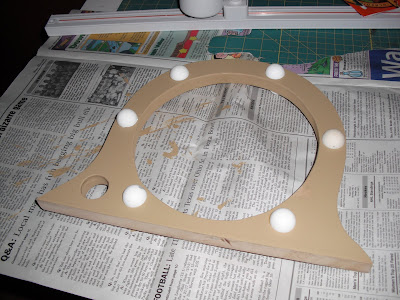
The tube is a concrete form normally used for making patio deck footings and the other aluminum bits are actual home heating ventilation parts. The aluminum bits needed beefed up a bit to look like steel plates instead of the thin flashing they are. I glued on some painted foam core to do just that. The tubes themselves only come in 4 foot sections so I needed the better part of three of them to go across the room. Only the middle one will actually have the lights. Brackets were needed on the ends to hold them up and the far ends will connect to the walls with the beefed up aluminum bits. Hopefully the whole thing when done will look cool and be functional.

Which is what I hope to present in the next episode.
Plus! Where did I put that darn gun cabinet again?

October 31, 2009

Sir Not-appearing-in-this-Halloween


NARRATOR: A year passed. Winter changed into Spring. Spring changed into Summer. Summer changed back into Winter. And Winter gave Spring and Summer a miss and went straight into Autumn. Until one day...

Winter showed up two days before Halloween with 6 inches of wet snow. Very frustrating after all the effort over the past few weeks. A lot of it has melted but that just means mud and I can't have the kids traipsing through that.

Well, if nothing else I have made a great start on my cemetery entrance pillars and arch for next year. "You just wait Charlie Brown. Next year I am going to find a pumpkin patch that's REAL sincere and wait for the Great Pumpkin!"

Next up I'll be starting back up on the room and the track lighting in particular...

October 11, 2009

Don't eat PINK snow either...


Old man winter has come early to Potter--that sumbitch. Nothing gets you in the holiday spirit like eight inches of snow. Problem is wrong holiday! We here at Kisler Manor will endeavor to persevere however...

You will start to get the big idea where I'm headed now with these images. I have routed out some corners and various odd patches here and there on the pillars to a depth of about a quarter inch which creates the illusion of layers in the foam to represent the stucco and the bricks. It also creates a blizzard of pink dust particles even worse than the drywalling mud was earlier with the room. These things have a wicked static cling and they won't just brush off and they track everywhere. Marsha is all smiles about that I can tell you.

Since its a deep freeze in the garage I moved into the living room (more wedded bliss, uhuh) and began laying out the brick pattern in the carved out sections using some brick sized templates and lots of rulers. Next I will carve away the "mortar" areas between the bricks just a little bit for a third layer. This should take the better part of the coming week.

I finished up the half-round trim moldings too. I created a sanding form from a piece of thick cardboard tube and some rough sandpaper glued to the inside. I was able to give them all more or less the same dimensions this way. They'll get glued on later.

By the way these columns are NOT my original idea but a Mr. Juggernaut's that I came upon surfing here: http://usersites.horrorfind.com/home/halloween/juggernaut/projects.html . I have made some changes more to to my liking however.

Upcoming steps will include painting of course and a arch over the top proclaiming
"CIMETIERE TORTUGA" to set the theme of a haunted pirate graveyard.

Right now Santa and some Christmas trees seem more appropriate.

September 27, 2009

The monolith--times two


Its hollow--it seems to go on forever--and Oh my God its pink.

The columns are cladded in the pink foam now and just so you have a sense of scale these things are nearly 6 feet tall. Don't ask me where I plan on keeping these things the other 364 days of the year but hey we'll figure that out then--meanwhile its build build build.

The other pink image shows one on its side with what will become foam trim molding pieces in their approximate locations. Each side has three pieces times 8 sides means a lot of these will be needed and that is what I have done this week. Each one is 2 one inch thick pieces glued together. Eventually I will be removing some material off one end to make a half round piece two inches tall to spruce up the columns a bit. That's going to make a ton of pink dust so hopefully I can move out of the garage for that step

The other pics are of an awesome prop I found online and bought. Pretty freakin' creepy huh? Well, I'll be "sea witching" her up a bit to go with the pirates theme better. Seaweed in her hair, and a scary scream maybe. Something like a mermaid ghost spirit I'm thinking.

Digging up stumps will continue next week as will the trimming off of the many face scratching costume grabbing branches. Stay tuned, Mateys

September 20, 2009

A-pirating we go!


Once again my house, my yard and my free time have been taken over by an ill tempered pack of pirate skeletons. They loved the joint so much last year they have invited even more of their kind to stir up mayhem and er, skulduggery this Halloween.

What about the Nautilus room I tuned in for you may be asking yourself. Well, I want to work on it but these guys are packing cold steel so I'm just going to do what they say until the first of November when they all depart whence they came for another year.

First off meet the newest addition to the scurvy crew, Drake. I found this guy at Menards and HAD to have him. He is perfect. He speaks three different phrases, and moves. You can even grab a wireless microphone an talk through him while his jaw moves. Real cool. He will be added to the treasure chest set I had last year.

The pink thingys are going to be new cemetery entrance columns and arch. The effect when I am done is going to look like brick that has been stuccoed over but due to age some of that underlying brick has been exposed again. Don't get it? You'll see!

The whole venue minus some yard stuff will be moving into the forest this year. It should really up the creepy factor and I am going for a whole haunted Tortuga cemetery theme. Most of my initial effort will be getting this area ready as there are stumps and branches that need removed and some low areas filled so as to not trip up the TOTs (Trick or Treaters)

I will try to begin posting every Sunday again. Check this!

June 7, 2009

Dark Side of the Room Part 2


I now have my version of a "salon" window installed. I think it looks pretty neat, especially at night. It is basically an acrylic skylight dome on its side with rivets glued to the flange which was painted a nice rusty color. As noted earlier the whole insert is removable for quick exit in a real life emergency.

I am very pleased to have reached this point as it is the one feature that really sells the room as a submarine to me. There are several small projects left to do before I can declare the room done but I have definitely crossed over the hump.

Coming projects include a painting booth vented to the outside for all season availability, overhead track lighting disguised as ventilation piping, a false wall conceal for my gun cabinet, and a makeover for my drafting table workbench.

This is now the running season and I am prepping and getting ready to attend a couple R/C events this summer so work will be proceeding at a slower pace than usual on the room. I'm not stopping for summer, just slowing to a crawl.

We will just pretend to be stranded in the Sargasso Sea for a few weeks!

April 26, 2009

No computers in 1870? No problem.


Well then...sort of a milestone, the computer desk is now done. It took a little figuring but now the computer, the modem, and all the wiring are hidden from view. The shelf it rests on is supported by a rubber caster and though it may not have been strictly necessary I like the idea of the added support. All the wires are coiled up and contained in a pocket behind the door itself and the modems are velcroed to the top of the case so I can see the status lights should the internet start acting wonky like it does from time to time.

But what about the monitor you ask? There were no CRT's or LED,s or plasma displays in Victorian times. You are so right my suddenly astute history buff. Have no fear the monitor will be hidden as well perhaps as an objet d'art as Jules would have said. That's next.

Note the finished plans holder and oh yes and check out the cool magazine holders. Don't they look neat? They are great. If you watch the movie most of the books in Nemo's library are red leather bound so they fit in so nicely and all my modeling magazines will be handy. As another small project I will be hiding my PC speakers on the upper shelf of the storage area and have decided (at some point) to display a 16" inch scale version of the Disney Nautilus submarine on top to kind of sell the whole 20,000 Leagues thing a bit.

I know many many of you base your lives around my room updates so be warned I am going to be slacking off as warm weather approaches. Things like yard work, holidays, family events and vacations are going to be taking up more of my time but never fear I will continue posting--just at a slower pace.

April 5, 2009

A Desk Job on the Nautilus?


Well the actual desk portion of the desk project is done though "I had a little trouble with the nailgun" as Charlie Brown might say. I wanted to attach some trim to the front edge of the desk to make it look beefier but glue alone wasn't working so I brought up the big guns and decided to use my power nailer. Trouble was it wasn't putting any nails in but making holes that looked like it was and so off pops the trim when I let go . Trying again and making sure I was getting cold hard steel added about double or triple the nail holes to fill which though now kinda disguised may end up bugging me enough for some kind of redo later.

The top bookcase is going smashingly I must say. As you see it its about halfway to done and I will be adding some decorative trim to the unpainted edges you see to give it some interest. I have ordered some magazine holders that look like old books on their backs and they will be stored here holding my treasured collection of SubCommittee Reports and Fine Scale Modelers for quick, ready and disguised reference anytime.

Below will come a platform and false wall to hide all the cords and the computer box but still make it accessible to put media in it and whatnot. When that is done I have to come up with some kind of new look for the monitor itself since it can't be hid per se and it is a very modern contrivance indeed.

Lastly the plain wood box is the beginning of a chart box. Or in this case a ships plans holder. Its laid out to give you and idea of how I will eventually be drilling holes and pushing dowels through to make a grid pattern. The box is a foot deep or so and should hold a rolled up plan ready for access beside my magnetic wall map. It will eventually sport some adornments and the same lovely red mahogany stain as all of the other wood in here. Models courtesy "Lazy Dog Modeling Service" c/o Matilda and Buddy-Lee.

Then that chair...I'm scared to death of that chair. Seatophobia maybe?

Perhaps It won't be that hard to reupholster....later.

March 29, 2009

Continental Shelfs


This week some littler projects done and a bigger one started.

I have put up two four foot long shelves with the brackets screwed directly into the wall studs. Upon these two will rest my first R/C modeling effort, a Liberty Ship, and my latest an Ohio class submarine of the type I once rode for fun and profit. Neither will fit exactly but I want to get them on display and out of the garage eventually.

The wonderful looking green orb is a tea light I found at Target a couple weeks ago hanging upon a painted hanging plant hook. Eventually it will be wired up and casting a green glow upon demand. Why? I don't know, nothing like it in the movie but its still neat.

Thirdly I have begun installing the built in desk after staining it the same dark mahogany as the chair. Its a very early picture to show the idea and I think you get the drift. Underneath will be storage to hide the computer case and most of the wiring and on top will be a short bookshelf type structure for even more storage most likely SubCommittee Reports and FineScale Modeler magazines I imagine.

The desk will occupy most of the coming week and hopefully I will have some finished looking images for you next time.

March 23, 2009

Captains Chair


Progress was slow this week due to a busy birthday schedule which included a trip to Joes Crab Shack for a bucket O' crab and a dessert of frozen crepe bananas foster instead of Mr. Lands' "pudding" of sauté of unborn octopus. Delightful!

What I DID acomplish was to take apart that old chair which was full of hundred year old dust, horsehair for cushions and something that looked like dried lawn clippings. Made quite a mess. Fortunately I kept all the fabric to use as templates for cutting new ones and will be substituting modern day cushy foam cut to size for the packing.

It took a couple tries to strip off all the old varnish and another couple coats of stain to get it looking good again. I will give it a further couple coats of glossy polyurethane shortly. When that dries I'll cut the foam and fabric and tack it all back together into what I hope will be a serviceable computer chair.

(NOTE) Everything I have said previously about the computer desk portion of this project please disregard. While I had measured everything correctly and laid it out just so in my mind, I just didn't like the looks of the modified store bought desk next to my storage units so I decided to go for a built-in type thing based loosely on a table I spied in one of the movie stills I refer to as I go through this project. It will be stained to match the wood of the chair and shelves and should look sweet. The computer case and all the cords will be hidden as well.

I'm also excited to have ordered the round skylight to serve as my "salon" window which should look totally awesome when I'm done with it.

Stay tuned sports fans...

March 8, 2009

Davey Jones' lockers


Its still Sunday, so I made it. Barely. But look what I got done this week.

The top pieces are now mounted on both these storage units. The thing on the wall is apparently called a "cleat" in the design business. It will serve as an anchor point for the back of the storage unit tops tying them to the wall and shoring up those cool looking shelfs which I made from poplar planks and lengths of galley rail. I REALLY like how they look. The far sides of the surface tops will also sport some of that railing later in the week to kind of tie it all together.

Remember those scrolls from way back? I originally painted them a gold color but Marsha correctly labeled them too "kingly" a color for this room so I went with an aged copper treatment instead which really goes well with the mahogany stain. The posts and scrolly things across the front are removable too so I won't have to work around them when I need a lot of counter space. Just pop 'em out and go.

I'll have to figure it out exactly but I bet I will have twice the counter space in here when I'm done as we have in our kitchen and I think I will actually have an excess of storage for a while too but as I start building models again alot of that will get eaten up.

Next up I have an old school Victorian looking chair I am going to attempt to reupholster. I know...Good Luck! Hopefully it will look good AND be useful and comfortable as the computer chair but I will have an eye to a backup plan should it not work out. Beanbags.

No, not really.