January 8, 2010

Steam valves O' light


While waiting for what I believe will be a no-show satellite dish repairman I fiddled in the room a bit and actually got most of the track lighting project done today.

The track lighting cord has been hidden under this coppery colored cord run. Hopefully it looks a bit like steam piping but it don't look like white power cord which is the point I'm trying to make.

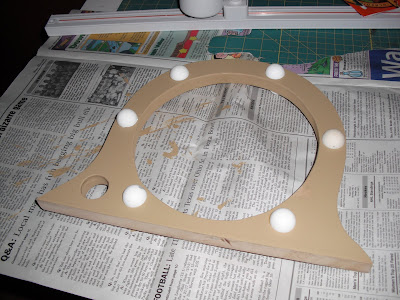
The track lighting just plugs into a wall socket but I wanted a way to turn it on and off, well a COOL way, and decided to use a dimmer switch with what appears to be a steam valve or something on it. Once I figured out where to plug it in making the switch box came next. I just built up around a standard fixture to try to get it looking a little more squarish. Made a lid to match it, lined up the screw holes, and bada-bing, instant steam box thingy. Painting this and the cord runs outside was troublesome in the current arctic conditions but we got there.

The dimmer switch instructions were in every language but Merican so I had to set up a test board and try out different configurations of wires till the light came on. Eureka! After that installation was straightforward and now the overhead floods and the hanging chandelier are both working off these dimmers.

Next up. Probably the chair. Scary scary chair...

December 22, 2009

A light in da pipe


Hah! I love it when a plan comes together...

I did get held up a bit trying to figure out how to cut the tubes to fit. You see one end is at a 45 degree angle because of the false wall and the all other cuts would need to be straight up and down. What I came up with was a cutting "jig" that I could set to any angle I wanted and would hold the tube still while I sawed it in half. It worked like a champ. Sometimes if you don't already have the right tool, you can make it.

The "pipe" is up there and its working now. I still have a few touch ups here and there. The main one will be covering all those screw holes with some same painted rivets. You can also still see the white from the track lighting unit itself so a little camouflage in the form of some carefully applied paint will be in order once the current blizzard passes. Stupid winter.

The cord and switch will be handled next. The switch will be a dimmer with one of the wheels I cast way back mounted on it. The cord will be in a run painted a brass color. This should be a cool way of turning on those overheads.

But right now I'd like to bring it down a little. Mellow out our groove some. And sincerely wish you all a joyous Christmas and a great New Year! Make it count!

And thanks for the support you have all given me over the years. Peace.

December 7, 2009

Nook of Armaments, Chapter 2, verses 9-21


Sorry no Holy Hand Grenades in there...

Christmas season and the weather have slowed down my progress. The track lighting itself is up but the "ventilation" tubing is not since it requires painting. Which requires outside. Which requires good weather. Etc etc.

We turn then to a quick little project to hide my utilitarian looking gun cabinet which certainly does not look the Nautilus part. It is simply a half box made from masonite, a couple long hinges, and some more of the ubiquitous rivets to form a door to hide and give access to the locker. Its been painted the same three part scheme as the surrounding wall and topped with some spare molding. Simple. Boring.

What you WILL see on the face of this thing though down the road is a number of aged looking brass gauges with depth and speed indicator needles and everything. One of the gauges will actually be functional. It is a real working inclinometer that ,when on a ship, shows the degree of roll the vessel has as it moves through the sea. Clearly the house won't be rolling or pitching but still, a neat nautical touch I thought.

Next post-I swear- will be the whole overhead track lighting tableau installed. Its going to be tricky to do but will look O' so cool.

November 15, 2009

Station the track (light)ing party


Sub talk..Ha ha

Anyhow, we are back at work in the room. We? Me, myself and and Buddy-Lee. We have spent the last couple of weeks un-halloweening the house and getting parts prepared for the overhead track lighting.

We can't just have a klunky looking track screwed to the ceiling but I need more light for the worktable and the painting booth. So what I am doing is trying to disguise the whole thing as rusty ventilation or seawater piping to blend in and look more subby.

The tube is a concrete form normally used for making patio deck footings and the other aluminum bits are actual home heating ventilation parts. The aluminum bits needed beefed up a bit to look like steel plates instead of the thin flashing they are. I glued on some painted foam core to do just that. The tubes themselves only come in 4 foot sections so I needed the better part of three of them to go across the room. Only the middle one will actually have the lights. Brackets were needed on the ends to hold them up and the far ends will connect to the walls with the beefed up aluminum bits. Hopefully the whole thing when done will look cool and be functional.

Which is what I hope to present in the next episode.
Plus! Where did I put that darn gun cabinet again?

October 31, 2009

Sir Not-appearing-in-this-Halloween


NARRATOR: A year passed. Winter changed into Spring. Spring changed into Summer. Summer changed back into Winter. And Winter gave Spring and Summer a miss and went straight into Autumn. Until one day...

Winter showed up two days before Halloween with 6 inches of wet snow. Very frustrating after all the effort over the past few weeks. A lot of it has melted but that just means mud and I can't have the kids traipsing through that.

Well, if nothing else I have made a great start on my cemetery entrance pillars and arch for next year. "You just wait Charlie Brown. Next year I am going to find a pumpkin patch that's REAL sincere and wait for the Great Pumpkin!"

Next up I'll be starting back up on the room and the track lighting in particular...

October 11, 2009

Don't eat PINK snow either...


Old man winter has come early to Potter--that sumbitch. Nothing gets you in the holiday spirit like eight inches of snow. Problem is wrong holiday! We here at Kisler Manor will endeavor to persevere however...

You will start to get the big idea where I'm headed now with these images. I have routed out some corners and various odd patches here and there on the pillars to a depth of about a quarter inch which creates the illusion of layers in the foam to represent the stucco and the bricks. It also creates a blizzard of pink dust particles even worse than the drywalling mud was earlier with the room. These things have a wicked static cling and they won't just brush off and they track everywhere. Marsha is all smiles about that I can tell you.

Since its a deep freeze in the garage I moved into the living room (more wedded bliss, uhuh) and began laying out the brick pattern in the carved out sections using some brick sized templates and lots of rulers. Next I will carve away the "mortar" areas between the bricks just a little bit for a third layer. This should take the better part of the coming week.

I finished up the half-round trim moldings too. I created a sanding form from a piece of thick cardboard tube and some rough sandpaper glued to the inside. I was able to give them all more or less the same dimensions this way. They'll get glued on later.

By the way these columns are NOT my original idea but a Mr. Juggernaut's that I came upon surfing here: http://usersites.horrorfind.com/home/halloween/juggernaut/projects.html . I have made some changes more to to my liking however.

Upcoming steps will include painting of course and a arch over the top proclaiming
"CIMETIERE TORTUGA" to set the theme of a haunted pirate graveyard.

Right now Santa and some Christmas trees seem more appropriate.

September 27, 2009

The monolith--times two


Its hollow--it seems to go on forever--and Oh my God its pink.

The columns are cladded in the pink foam now and just so you have a sense of scale these things are nearly 6 feet tall. Don't ask me where I plan on keeping these things the other 364 days of the year but hey we'll figure that out then--meanwhile its build build build.

The other pink image shows one on its side with what will become foam trim molding pieces in their approximate locations. Each side has three pieces times 8 sides means a lot of these will be needed and that is what I have done this week. Each one is 2 one inch thick pieces glued together. Eventually I will be removing some material off one end to make a half round piece two inches tall to spruce up the columns a bit. That's going to make a ton of pink dust so hopefully I can move out of the garage for that step

The other pics are of an awesome prop I found online and bought. Pretty freakin' creepy huh? Well, I'll be "sea witching" her up a bit to go with the pirates theme better. Seaweed in her hair, and a scary scream maybe. Something like a mermaid ghost spirit I'm thinking.

Digging up stumps will continue next week as will the trimming off of the many face scratching costume grabbing branches. Stay tuned, Mateys